
Services in ROS are another type of communication between different ROS nodes. After you learned how to use Topics, you might wonder, why you would need something else for communication, right?
As explained in the overview, different communication types are used for different purposes. While Topics are mainly used for continuous streams of data, Services will be used for tasks where a constant data stream would be overkill, especially when the data exchange is less frequent. Another use case would be when your program relies on receiving feedback from a sent information, for example when your robot finished a task.
You can find more information about Services in the official ROS wiki (here and here).
What are Services?
A Service is a type of communication that adopts the idea of a handshake protocol as it is implemented by having a client application that will send a request to the server to perform a task. After the server has finished the task, it will send a message back to the client to notify it of the result. The client will patiently wait for a response before it will continue with other tasks. Especially this last behaviour is one of the major drawbacks of using services as the client is basically unresponsive while waiting for the response. The advantage is that it provides a simple and elegant solution that receives a response rather than broadcasting into the unknown while producing a massive amount of unnecessary data traffic.
If you would like to reproduce the same strategy with Topics, you would need to have two publishers and two subscribers that constantly send the request and the answer to make sure the message has been sent and the result has been received. This would create unnecessary data traffic to obtain the same result.
After all these explanations, let’s have a look at a service message. As already mentioned, there is two-way communication which means the messages have two components. An example is the service message /turtle1/set_pen which is a message for the TurtleSim program seen earlier.
The service message has a request and a response part, with their respective data types (which can be any type such as int8, uint16, string, bool, …), that are separated by three dashes as seen below:
requestType request
---
responseType response
For the /turtle1/set_pen message, this message looks as follows:
uint8 r
uint8 g
uint8 b
uint8 width
uint8 off
---
Note: The request can be composed of several components or it can be empty. The same holds true for the response. In the above example, the values of the three base colours are given as part of the request while the response is an empty message. This means that there is a response, but it does not contain any data. Pay attention that, even though the response is empty, it needs to be sent as otherwise, the client will keep waiting for a response forever.
The message type of the /turtle1/set_pen message is a /turtlesim/SetPen message, a custom message for this application. There are only few standard message types for services as they are often very specific for a task. It is fairly common to create a new service message for each service used, unlike topics that usually rely on standard message types.
Using Services in Terminal
In case you only want to get some information about existing Services or you just want to test the function of a service, there is no need to write a ROS program to do that. Instead, you can simply use the terminal to do the job.
Starting TurtleSim
Before you get started, open a new terminal and start a roscore with the following command:
roscoreThen, open another terminal and start the TurtleSim node with the following command:
rosrun turtlesim turtlesim_nodeThis should open a turtlesim_node window:

The first thing you need to know is, how to find which Services are already available. This allows you to use the Services that already exist.
Finding Information about the Services
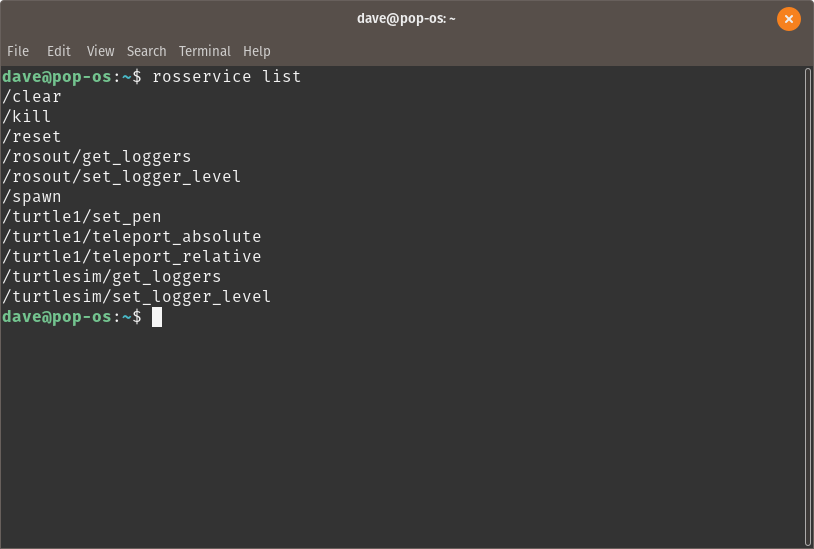
To see a list of the existing Services, use the following command:
rosservice listThis command will list all the Services that are already available. This allows you to see if your Server is running or which Services are ready for use already. (More on Servers later.) Your terminal should provide to you the following list:
If you want to have more information concerning a specific Service, use the following command:
rosservice info /spawnThis command should show you some details about the Service called /spawn.
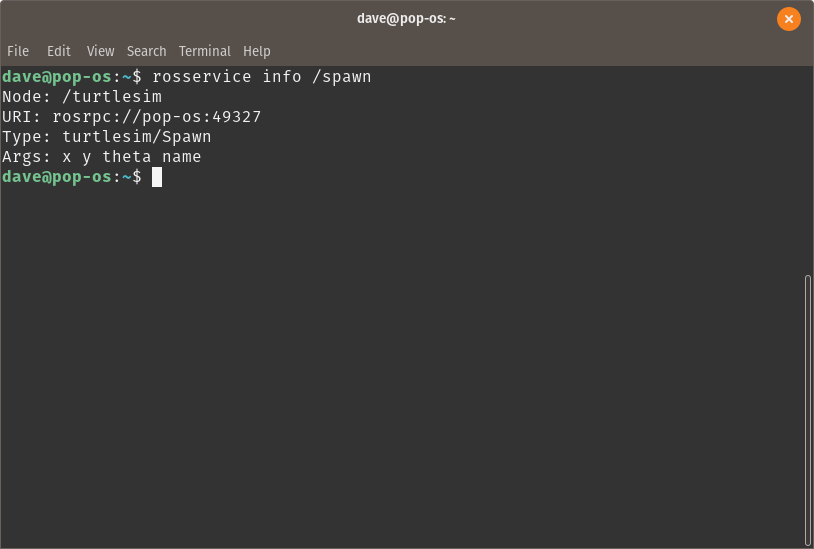
Before you can do something with that Service, you need to know what kind of message type it is expecting. The message type is in this case is called turtlesim/Spawn. You can find out more about this type with the command:
rossrv show turtlesim/SpawnThis command should display the following result in the terminal:
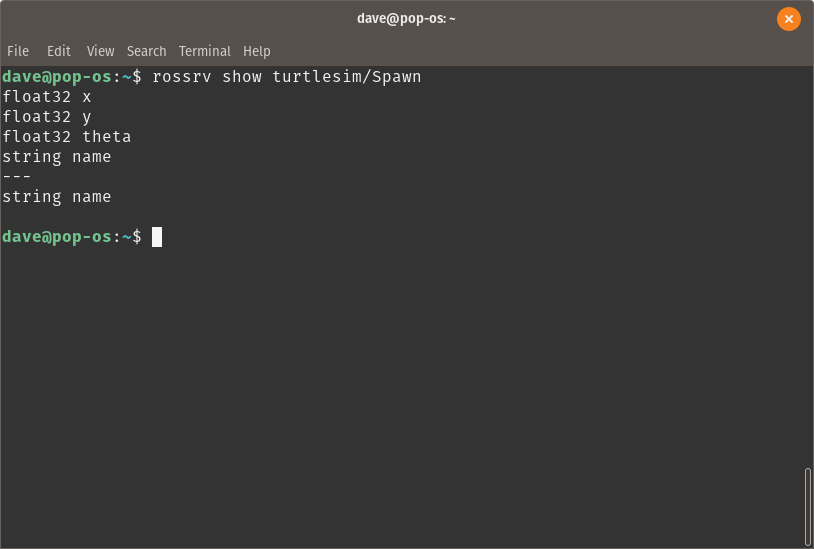
As you can see, the message type of this Service consists of several components:
float32 x
float32 y
float32 theta
string name
---
string name
As you can see, this Service consists of 4 input parameters and one output parameter.
Calling the Service
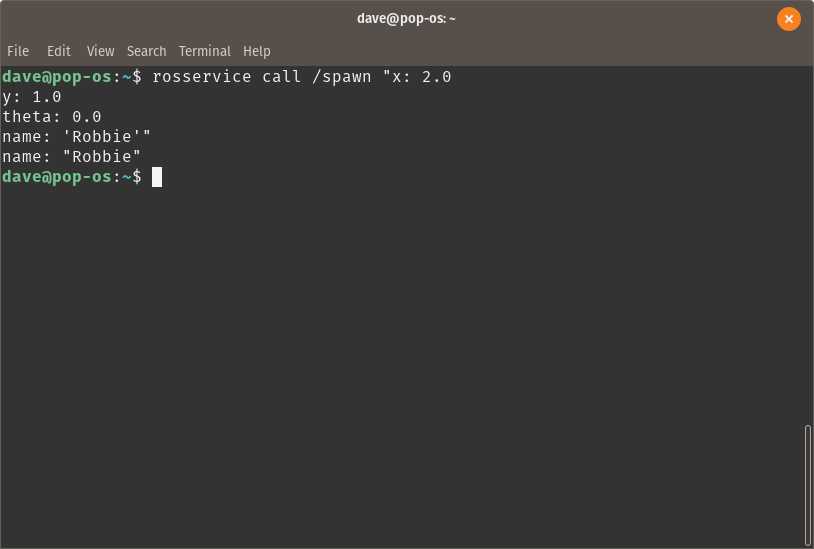
Now, that you know the details of the Service /spawn, you can use the Service with the following command:
rosservice call /spawn "x: 2.0
y: 1.0
theta: 0.0
name: 'Robbie'"
Once you press enter, the terminal will give you a response:
And a new turtle will appear in the turtlesim_node window:
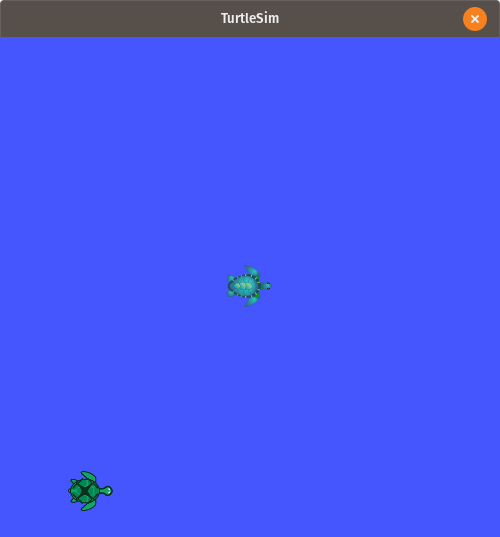
The new turtle has appeared on the coordinates that you specified earlier. Note: you don’t need to type the entire command by yourself. Instead, make use of the autocomplete function with the TAB key:
rosservice call /spawn [TAB][TAB]In the previous part about Topics, you learned how to Subscribe to Topics and how to Publish them. In this case, though a Service also consists of two parts, you can only use one part in the terminal. The part that you just used would be called a Client that sends a request (like you did through the terminal). The other part is the Server which performs an algorithm with a return value that is returned back to the Client. As the Server part is usually more complex, it cannot be done in the terminal.
As with the Topics, using the terminal to interact with Services is usually only done for testing or quickly checking if the Services are running.
Using Services in Python
The usual method of using Services is through ROS nodes. In the next parts, you will see how to use Services with Python.
As mentioned earlier, there are two parts of the Service: the Client and the Server. These two parts can be split up into two separate Python nodes.
Service Clients
Let’s start with the Clients. The Client is the part that calls the Service. This means it sends a request to the Server and then waits for a response. One node can consist of several Clients that call different Services.
To start, you can go to the package you already made earlier:
cd ~/catkin_ws/src/my_turtlesim/scriptsNow you can create a new file called simple_client.py in which you will write the Python code to create a Service Client node:
gedit simple_client.pyNow, an empty text editor window will pop up where you can type down the following code:
#!/usr/bin/env python

import rospy
from turtlesim.srv import Spawn, SpawnRequest

def spawn_turtle_client(x, y, theta, name):
    rospy.wait_for_service('/spawn')
    try:
        spawn_turtle = rospy.ServiceProxy('/spawn', Spawn)
        server_response = spawn_turtle(x, y, theta, name)
        return server_response.name
    except rospy.ServiceException as e:
        print("Service call failes: %s"%e)


if __name__=="__main__":
    rospy.init_node("my_client_node")
    rate = rospy.Rate(10)

    print("Calling Spawn Service!")
    service_response = spawn_turtle_client(2.0, 1.0, 0.0, "Robbie")
    print("Turtle %s has spawned!"%service_response)

    while not rospy.is_shutdown():
        rate.sleep()
Save the code and then make the file executable with the following command:
chmod +x ~/catkin_ws/src/my_turtlesim/scripts/simple_client.pyWhat this code does, is first importing the rospy library and importing the Service message type Spawn from the subfolder srv from the ROS package called turtlesim.
#!/usr/bin/env python

import rospy
from turtlesim.srv import Spawn, SpawnRequest
The next part creates a function that first waits until the Service with the name /spawn is available. This prevents the node to run before the Service Server is up and running and therefore prevents an unnecessary error that could occur otherwise. This is considered a good practice.
Next, within the try statement, the function creates a Service Proxy that is defined by providing the name of the Service and the type of the message. This proxy is then used to provide the arguments necessary to the Server. The parameters are defined by the message type of the Spawn message. Then, the response of this Service Request is stored in a variable and returned as output of the function.
def spawn_turtle_client(x, y, theta, name):
    rospy.wait_for_service('/spawn')
    try:
        spawn_turtle = rospy.ServiceProxy('/spawn', Spawn)
        server_response = spawn_turtle(x, y, theta, name)
        return server_response.name
    except rospy.ServiceException as e:
        print("Service call failes: %s"%e)
In this part of the code, a ROS node is being created and a rate for the while loop is defined. For this example, the while loop is not necessary and is only there to prevent the program from closing automatically after the Service Response is being received by the Client. Except from that, this part only calls the function that has been explained earlier and then starts an infinite while loop intil the user stops the program.
if __name__=="__main__":
    rospy.init_node("my_client_node")
    rate = rospy.Rate(10)

    print("Calling Spawn Service!")
    service_response = spawn_turtle_client(2.0, 1.0, 0.0, "Robbie")
    print("Turtle %s has spawned!"%service_response)

    while not rospy.is_shutdown():
        rate.sleep()
In short terms, this Python node does the same as you did earlier with the terminal, but then in a Python script.
Make sure that the roscore and the turtlesim_node are running. You can run the Client program with the following command:
rosrun my_turtlesim simple_client.pyIf everything went correctly, a new turtle should appear and a message should be displayed in the terminal window in which you started the program.
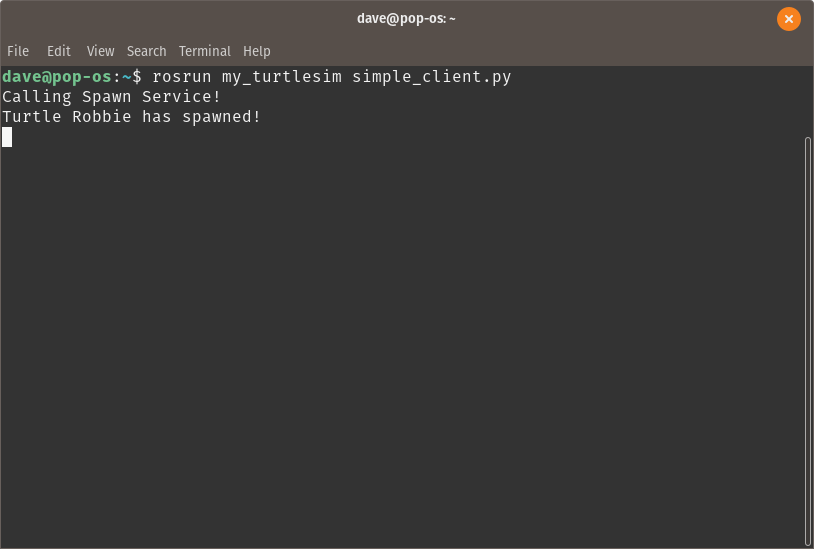
You can see that the curser in the terminal is waiting. The program does not finish on its own and you need to press CTRL-c to terminate the program.
Note: You can only use this program once to spawn a new turtle. When you run the program a second time, ROS will complain that a turtle with the name “Robbie” already exists.
Service Servers
After setting up a Service Client, you will want to know how to write a Service Server in Python. The Server is the part of a Service that is being called and performs an action as a result. When the action is finished, the Server provides a response to the Client that sent the Request.
First, go to the directory containing your scripts that you made earlier.
cd ~/catkin_ws/src/my_turtlesim/scriptsNow, create a new empty file and open it with your text editor.
gedit simple_server.pyBefore you can type the code for running your Service Server node, you want to decide which message type you will use for calling the Service. There are some standard message types that you can use (see here). Let’s say you want to create a service that will allow you to make the turtle move in a circle after the service call. The message will not contain any data except for the information on when to start but you do want to know if the message has been received correctly. Therefore, the Trigger Service message seems ideal as there is no input data and you receive feedback.
The Trigger message contains the following information:
---
bool success   # indicate successful run of triggered service
string message # informational, e.g. for error messages
The idea is that the client can send a message to the server to request that the turtle starts moving. As soon as the service call is received the server will reply and make the turtle move in circles.
The code for the Service Server will look as seen here below. Note that the code also contains code to publish Topic.
#!/usr/bin/env python

import rospy
from geometry_msgs.msg import Twist
from std_srvs.srv import Trigger, TriggerResponse


def handle_make_circle(req):
    print("Service call received: Starting movement")
    response = TriggerResponse(True, "Operation complete")
    velocity_publisher = rospy.Publisher("/turtle1/cmd_vel", Twist, queue_size=10)
    rate = rospy.Rate(10)
    vel_message = Twist()
    vel_message.linear.x = 0.5
    vel_message.angular.z = 0.5
    countdown = 240
    while not rospy.is_shutdown() and countdown > 0:
        velocity_publisher.publish(vel_message)
        countdown -= 1
        rate.sleep()
    return response


def make_circle_server():
    trigger_server = rospy.Service('make_circles', Trigger, handle_make_circle)
    print("Listening to requests")
    rospy.spin()


if __name__ == "__main__":
    rospy.init_node("turtlesim_circle_server")
    make_circle_server()
In the first part, you only tell ROS which python version you use and which modules you import. In this case, you need to import the service message including the response and also the geometry Twist message for publishing the velocity in a Topic.
#!/usr/bin/env python

import rospy
from geometry_msgs.msg import Twist
from std_srvs.srv import Trigger, TriggerResponse
The moment that a service call is received, it will trigger a function in the code. In this case, the function is responsible to make the TurtleSim move in circles. This is done by creating a publisher and then sending messages to the topic /turtle1/cmd_vel. In this implementation, the topic is published repeatedly in a while-loop until approximately two full circles have been accomplished. The function finished by returning the service response.
def handle_make_circle(req):
    print("Service call received: Starting movement")
    response = TriggerResponse(True, "Operation complete")
    vel_publisher = rospy.Publisher("/turtle1/cmd_vel", Twist, queue_size=10)
    rate = rospy.Rate(10)
    vel_message = Twist()
    vel_message.linear.x = 0.5
    vel_message.angular.z = 0.5
    countdown = 240
    while not rospy.is_shutdown() and countdown > 0:
        vel_publisher.publish(vel_message)
        countdown -= 1
        rate.sleep()
    return response
In the function make_circle_server() the name of the service is defined to be make_circles and the message type is set to Trigger. The last parameter defines which function should be called when a new service call is received. It is important to add the rospy.spin() function as otherwise the server will be closed immediately after creating the server.
def make_circle_server():
    trigger_server = rospy.Service('make_circles', Trigger, handle_make_circle)
    print("Listening to requests")
    rospy.spin()
The last part of the code simply creates the ROS node to communicate with the ROS master. Also, it calls the function that actually creates the service server.
if __name__ == "__main__":
    rospy.init_node("turtlesim_circle_server")
    make_circle_server()
Save the code with your text editor and close it. Don’t forget to make your Python program executable:
chmod +x ~/catkin_ws/src/my_turtlesim/scripts/simple_server.pyAlso, make sure that the TurtleSim node is running:
rosrun turtlesim turtlesim_nodeThe TurtleSim should be visible and it should be standing still.

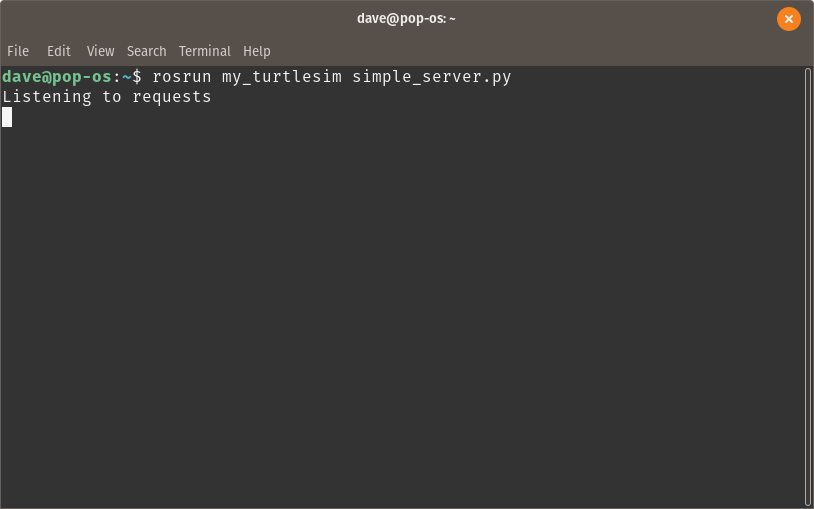
Now, start the server node with the following command:
rosrun my_turtlesim simple_server.pyYou should see that the servier is running and waiting. If it closes immediately, make sure that you added the function rospy.spin() in your code after creating the server.
You can now call the server through the terminal. To make shure it is active, use the command:
rosservice listThis should bring up the following list:

To call the service, you can type the name of the service and then use the autocomplete function by double-tapping the TAB key.
rosservice call /make_circles [TAB][TAB]This should auto complete the command:

After executing the command, you can see how the TurtleSim starts moving in a circle.
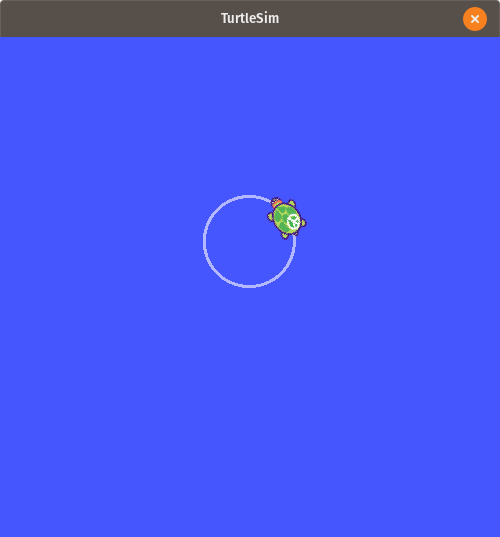
After about two completed circles, the turtle will stop moving and you can see a response in the terminal from which you called the service:
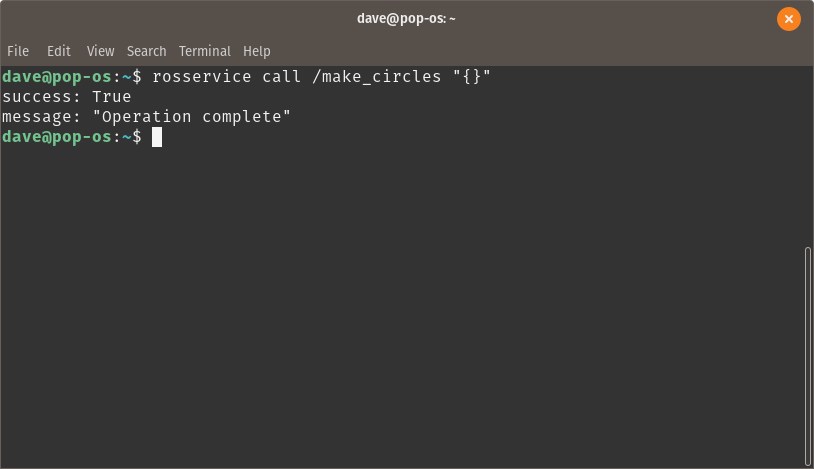
The response from the server is sent after the server has finished the task. You can see that the task has been finished successfully and that a message has been sent as well. This can tell you, or your program, that a task has been accomplished so that the next steps can be done. If the process failed, you might want to repeat the service call or you want to abort the mission and if it is successful, you know that the robot can continue with its task.
You may notice that the client is not able to do anything else than waiting for a response from the server. This is not very efficient if the task takes as long as in this last case where the turtle is moving around in circles. If you want your client to do other things while waiting for the response, you probably want to use an Action Server instead.