Using Services

Services in ROS are another type of communication between different ROS nodes. After you learned how to use Topics, you might wonder, why you would need something else for communication, right?

As explained in the overview, different communication types are used for different purposes. While Topics are mainly used for continuous streams of data, Services will be used for tasks where a constant data stream would be overkill, especially when the data exchange is less frequent. Another use case would be when your program relies on receiving feedback from a sent information, for example when your robot finished a task.

You can find more information about Services in the official ROS wiki (here and here).

What are Services?

A Service is a type of communication that adopts the idea of a handshake protocol as it is implemented by having a client application that will send a request to the server to perform a task. After the server has finished the task, it will send a message back to the client to notify it of the result. The client will patiently wait for a response before it will continue with other tasks. Especially this last behaviour is one of the major drawbacks of using services as the client is basically unresponsive while waiting for the response. The advantage is that it provides a simple and elegant solution that receives a response rather than broadcasting into the unknown while producing a massive amount of unnecessary data traffic.

If you would like to reproduce the same strategy with Topics, you would need to have two publishers and two subscribers that constantly send the request and the answer to make sure the message has been sent and the result has been received. This would create unnecessary data traffic to obtain the same result.

After all these explanations, let’s have a look at a service message. As already mentioned, there is two-way communication which means the messages have two components. An example is the service message /turtle1/set_pen which is a message for the TurtleSim program seen earlier.

The service message has a request and a response part, with their respective data types (which can be any type such as int8, uint16, string, bool, …), that are separated by three dashes as seen below:

requestType request
---
responseType response

For the /turtle1/set_pen message, this message looks as follows:

uint8 r
uint8 g
uint8 b
uint8 width
uint8 off
---

Note: The request can be composed of several components or it can be empty. The same holds true for the response. In the above example, the values of the three base colours are given as part of the request while the response is an empty message. This means that there is a response, but it does not contain any data. Pay attention that, even though the response is empty, it needs to be sent as otherwise, the client will keep waiting for a response forever.

The message type of the /turtle1/set_pen message is a /turtlesim/SetPen message, a custom message for this application. There are only few standard message types for services as they are often very specific for a task. It is fairly common to create a new service message for each service used, unlike topics that usually rely on standard message types.

Using Services in Terminal

In case you only want to get some information about existing Services or you just want to test the function of a service, there is no need to write a ROS program to do that. Instead, you can simply use the terminal to do the job.

Starting TurtleSim

Before you get started, open a new terminal and start a roscore with the following command:

roscore

Then, open another terminal and start the TurtleSim node with the following command:

rosrun turtlesim turtlesim_node

This should open a turtlesim_node window:

The first thing you need to know is, how to find which Services are already available. This allows you to use the Services that already exist.

Finding Information about the Services

To see a list of the existing Services, use the following command:

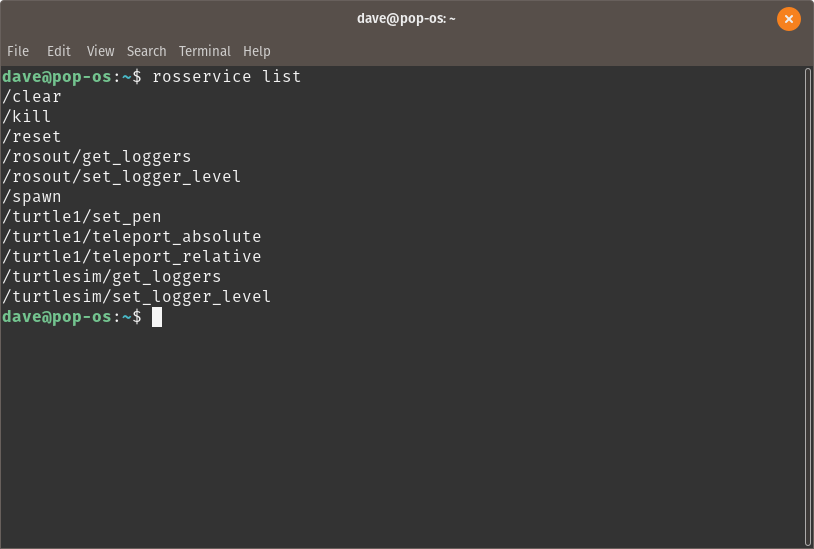
rosservice list

This command will list all the Services that are already available. This allows you to see if your Server is running or which Services are ready for use already. (More on Servers later.) Your terminal should provide to you the following list:
If you want to have more information concerning a specific Service, use the following command:

rosservice info /spawn

This command should show you some details about the Service called /spawn.
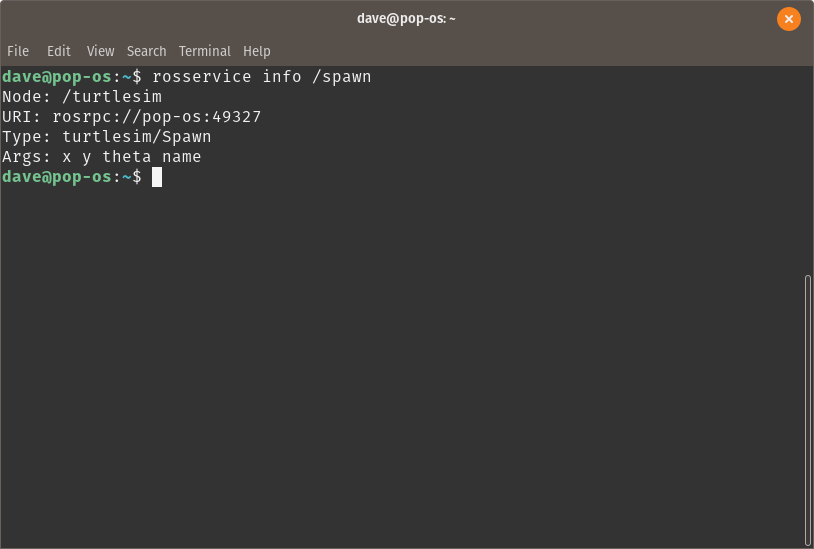
Before you can do something with that Service, you need to know what kind of message type it is expecting. The message type is in this case is called turtlesim/Spawn. You can find out more about this type with the command:

rossrv show turtlesim/Spawn

This command should display the following result in the terminal:
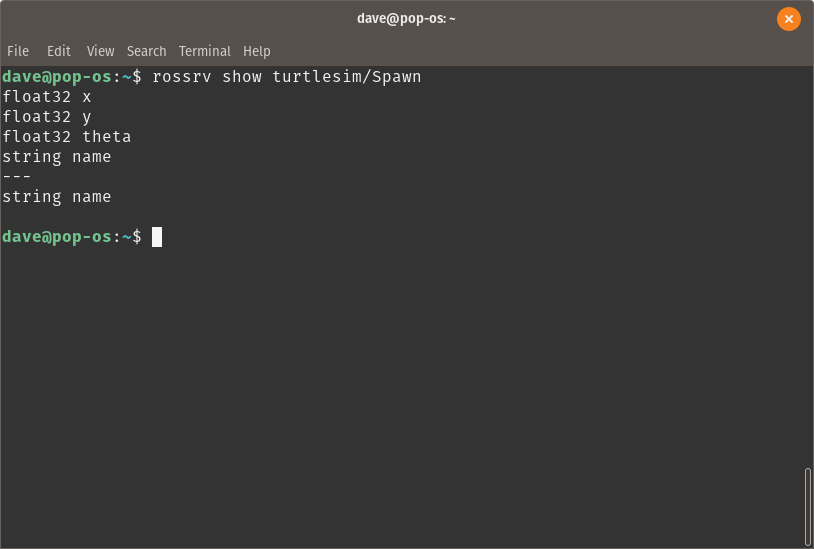
As you can see, the message type of this Service consists of several components:

float32 x
float32 y
float32 theta
string name
---
string name

As you can see, this Service consists of 4 input parameters and one output parameter.

Calling the Service

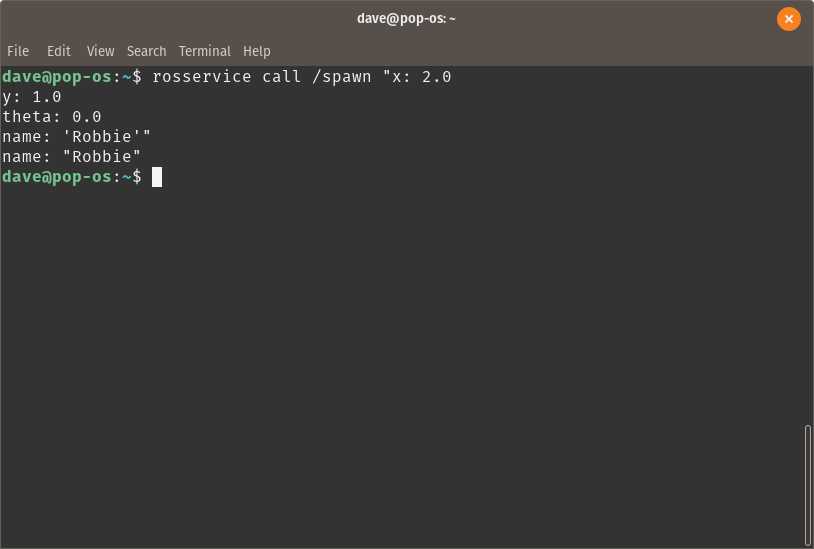
Now, that you know the details of the Service /spawn, you can use the Service with the following command:

rosservice call /spawn "x: 2.0
y: 1.0
theta: 0.0
name: 'Robbie'"

Once you press enter, the terminal will give you a response:
And a new turtle will appear in the turtlesim_node window:

The new turtle has appeared on the coordinates that you specified earlier. Note: you don’t need to type the entire command by yourself. Instead, make use of the autocomplete function with the TAB key:

rosservice call /spawn [TAB][TAB]

In the previous part about Topics, you learned how to Subscribe to Topics and how to Publish them. In this case, though a Service also consists of two parts, you can only use one part in the terminal. The part that you just used would be called a Client that sends a request (like you did through the terminal). The other part is the Server which performs an algorithm with a return value that is returned back to the Client. As the Server part is usually more complex, it cannot be done in the terminal.

As with the Topics, using the terminal to interact with Services is usually only done for testing or quickly checking if the Services are running.

Using Services in Python

The usual method of using Services is through ROS nodes. In the next parts, you will see how to use Services with Python.

As mentioned earlier, there are two parts of the Service: the Client and the Server. These two parts can be split up into two separate Python nodes.

Service Clients

Let’s start with the Clients. The Client is the part that calls the Service. This means it sends a request to the Server and then waits for a response. One node can consist of several Clients that call different Services.

To start, you can go to the package you already made earlier:

cd ~/catkin_ws/src/my_turtlesim/scripts

Now you can create a new file called simple_client.py in which you will write the Python code to create a Service Client node:

gedit simple_client.py

Now, an empty text editor window will pop up where you can type down the following code:

#!/usr/bin/env python 

import rospy
from turtlesim.srv import Spawn, SpawnRequest

def spawn_turtle_client(x, y, theta, name):
    rospy.wait_for_service('/spawn')
    try:
        spawn_turtle = rospy.ServiceProxy('/spawn', Spawn)
        server_response = spawn_turtle(x, y, theta, name)
        return server_response.name
    except rospy.ServiceException as e:
        print("Service call failes: %s"%e)

    
if __name__=="__main__":
    rospy.init_node("my_client_node")
    rate = rospy.Rate(10)

    print("Calling Spawn Service!")
    service_response = spawn_turtle_client(2.0, 1.0, 0.0, "Robbie")
    print("Turtle %s has spawned!"%service_response)

    while not rospy.is_shutdown():
        rate.sleep()

Save the code and then make the file executable with the following command:

chmod +x ~/catkin_ws/src/my_turtlesim/scripts/simple_client.py

What this code does, is first importing the rospy library and importing the Service message type Spawn from the subfolder srv from the ROS package called turtlesim.

#!/usr/bin/env python 

import rospy
from turtlesim.srv import Spawn, SpawnRequest

The next part creates a function that first waits until the Service with the name /spawn is available. This prevents the node to run before the Service Server is up and running and therefore prevents an unnecessary error that could occur otherwise. This is considered a good practice.

Next, within the try statement, the function creates a Service Proxy that is defined by providing the name of the Service and the type of the message. This proxy is then used to provide the arguments necessary to the Server. The parameters are defined by the message type of the Spawn message. Then, the response of this Service Request is stored in a variable and returned as output of the function.

def spawn_turtle_client(x, y, theta, name):
    rospy.wait_for_service('/spawn')
    try:
        spawn_turtle = rospy.ServiceProxy('/spawn', Spawn)
        server_response = spawn_turtle(x, y, theta, name)
        return server_response.name
    except rospy.ServiceException as e:
        print("Service call failes: %s"%e)

In this part of the code, a ROS node is being created and a rate for the while loop is defined. For this example, the while loop is not necessary and is only there to prevent the program from closing automatically after the Service Response is being received by the Client. Except from that, this part only calls the function that has been explained earlier and then starts an infinite while loop intil the user stops the program.

if __name__=="__main__":
    rospy.init_node("my_client_node")
    rate = rospy.Rate(10)

    print("Calling Spawn Service!")
    service_response = spawn_turtle_client(2.0, 1.0, 0.0, "Robbie")
    print("Turtle %s has spawned!"%service_response)

    while not rospy.is_shutdown():
        rate.sleep()

In short terms, this Python node does the same as you did earlier with the terminal, but then in a Python script.

Make sure that the roscore and the turtlesim_node are running. You can run the Client program with the following command:

rosrun my_turtlesim simple_client.py

If everything went correctly, a new turtle should appear and a message should be displayed in the terminal window in which you started the program.
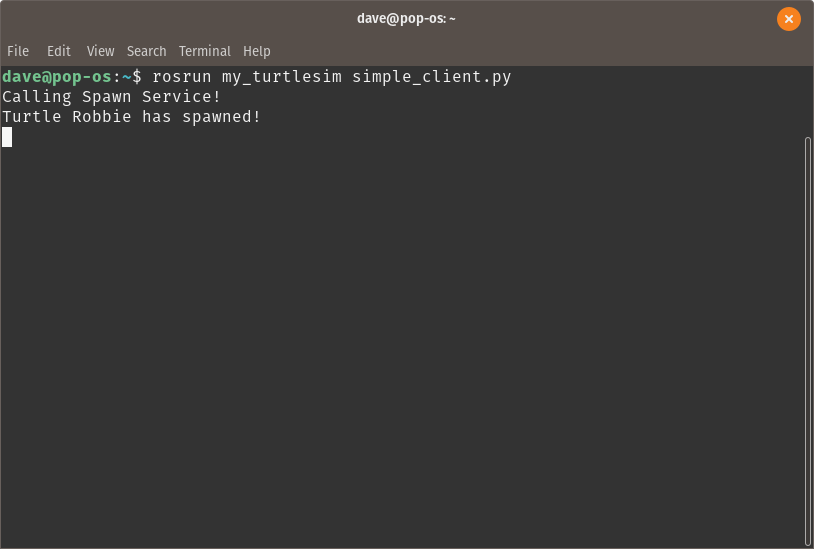
You can see that the curser in the terminal is waiting. The program does not finish on its own and you need to press CTRL-c to terminate the program.

Note: You can only use this program once to spawn a new turtle. When you run the program a second time, ROS will complain that a turtle with the name “Robbie” already exists.

Service Servers

After setting up a Service Client, you will want to know how to write a Service Server in Python. The Server is the part of a Service that is being called and performs an action as a result. When the action is finished, the Server provides a response to the Client that sent the Request.

First, go to the directory containing your scripts that you made earlier.

cd ~/catkin_ws/src/my_turtlesim/scripts

Now, create a new empty file and open it with your text editor.

gedit simple_server.py

Before you can type the code for running your Service Server node, you want to decide which message type you will use for calling the Service. There are some standard message types that you can use (see here). Let’s say you want to create a service that will allow you to make the turtle move in a circle after the service call. The message will not contain any data except for the information on when to start but you do want to know if the message has been received correctly. Therefore, the Trigger Service message seems ideal as there is no input data and you receive feedback.

The Trigger message contains the following information:

---
bool success   # indicate successful run of triggered service
string message # informational, e.g. for error messages

The idea is that the client can send a message to the server to request that the turtle starts moving. As soon as the service call is received the server will reply and make the turtle move in circles.

The code for the Service Server will look as seen here below. Note that the code also contains code to publish Topic.

#!/usr/bin/env python

import rospy
from geometry_msgs.msg import Twist
from std_srvs.srv import Trigger, TriggerResponse


def handle_make_circle(req):
    print("Service call received: Starting movement")
    response = TriggerResponse(True, "Operation complete")
    velocity_publisher = rospy.Publisher("/turtle1/cmd_vel", Twist, queue_size=10)
    rate = rospy.Rate(10)
    vel_message = Twist()
    vel_message.linear.x = 0.5
    vel_message.angular.z = 0.5
    countdown = 240
    while not rospy.is_shutdown() and countdown > 0:
        velocity_publisher.publish(vel_message)
        countdown -= 1
        rate.sleep()
    return response


def make_circle_server():
    trigger_server = rospy.Service('make_circles', Trigger, handle_make_circle)
    print("Listening to requests")
    rospy.spin()


if __name__ == "__main__":
    rospy.init_node("turtlesim_circle_server")
    make_circle_server()

In the first part, you only tell ROS which python version you use and which modules you import. In this case, you need to import the service message including the response and also the geometry Twist message for publishing the velocity in a Topic.

#!/usr/bin/env python

import rospy
from geometry_msgs.msg import Twist
from std_srvs.srv import Trigger, TriggerResponse

The moment that a service call is received, it will trigger a function in the code. In this case, the function is responsible to make the TurtleSim move in circles. This is done by creating a publisher and then sending messages to the topic /turtle1/cmd_vel. In this implementation, the topic is published repeatedly in a while-loop until approximately two full circles have been accomplished. The function finished by returning the service response.

def handle_make_circle(req):
    print("Service call received: Starting movement")
    response = TriggerResponse(True, "Operation complete")
    vel_publisher = rospy.Publisher("/turtle1/cmd_vel", Twist, queue_size=10)
    rate = rospy.Rate(10)
    vel_message = Twist()
    vel_message.linear.x = 0.5
    vel_message.angular.z = 0.5
    countdown = 240
    while not rospy.is_shutdown() and countdown > 0:
        vel_publisher.publish(vel_message)
        countdown -= 1
        rate.sleep()
    return response

In the function make_circle_server() the name of the service is defined to be make_circles and the message type is set to Trigger. The last parameter defines which function should be called when a new service call is received. It is important to add the rospy.spin() function as otherwise the server will be closed immediately after creating the server.

def make_circle_server():
    trigger_server = rospy.Service('make_circles', Trigger, handle_make_circle)
    print("Listening to requests")
    rospy.spin()

The last part of the code simply creates the ROS node to communicate with the ROS master. Also, it calls the function that actually creates the service server.

if __name__ == "__main__":
    rospy.init_node("turtlesim_circle_server")
    make_circle_server()

Save the code with your text editor and close it. Don’t forget to make your Python program executable:

chmod +x ~/catkin_ws/src/my_turtlesim/scripts/simple_server.py

Also, make sure that the TurtleSim node is running:

rosrun turtlesim turtlesim_node

The TurtleSim should be visible and it should be standing still.

Now, start the server node with the following command:

rosrun my_turtlesim simple_server.py

You should see that the servier is running and waiting. If it closes immediately, make sure that you added the function rospy.spin() in your code after creating the server.
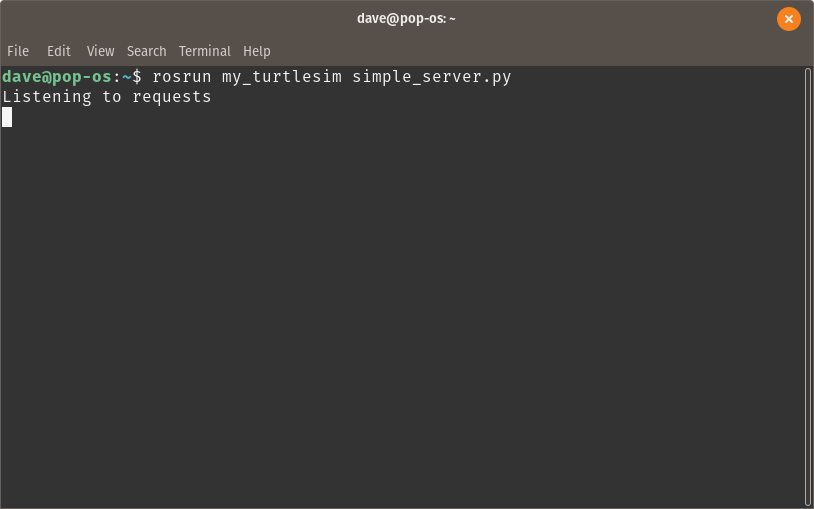
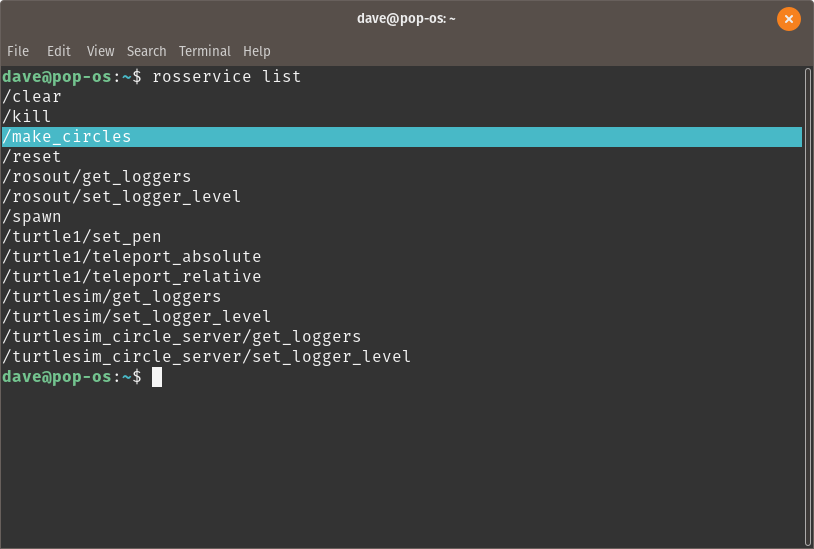
You can now call the server through the terminal. To make shure it is active, use the command:

rosservice list

This should bring up the following list:
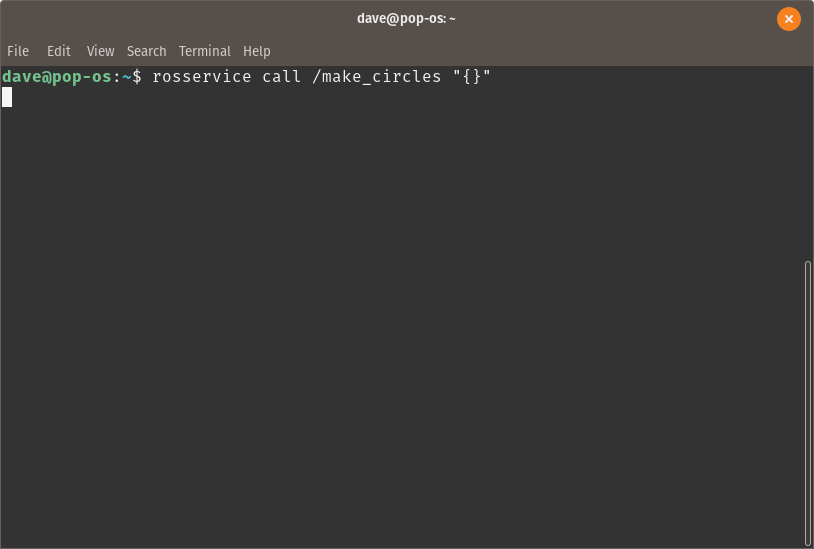
To call the service, you can type the name of the service and then use the autocomplete function by double-tapping the TAB key.

rosservice call /make_circles [TAB][TAB]

This should auto complete the command:

After executing the command, you can see how the TurtleSim starts moving in a circle.
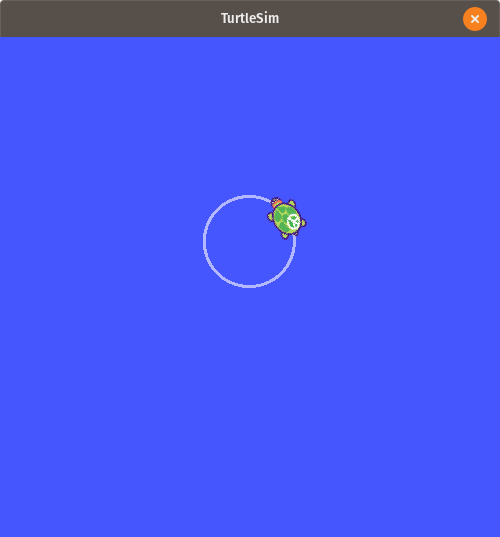
After about two completed circles, the turtle will stop moving and you can see a response in the terminal from which you called the service:
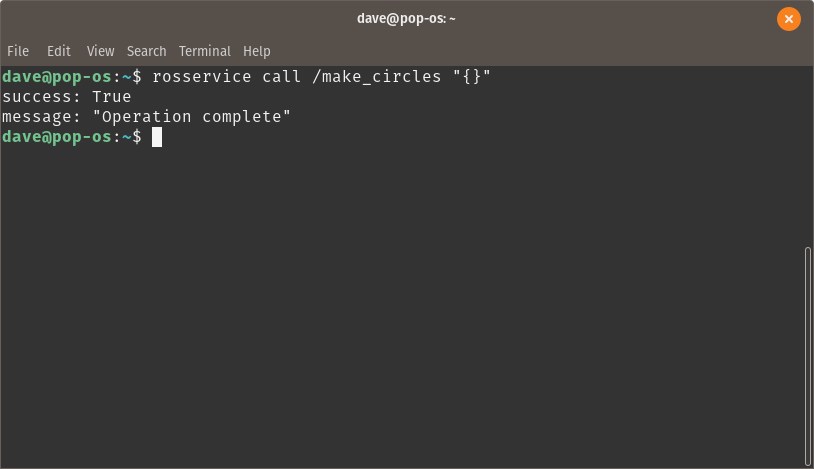
The response from the server is sent after the server has finished the task. You can see that the task has been finished successfully and that a message has been sent as well. This can tell you, or your program, that a task has been accomplished so that the next steps can be done. If the process failed, you might want to repeat the service call or you want to abort the mission and if it is successful, you know that the robot can continue with its task.

You may notice that the client is not able to do anything else than waiting for a response from the server. This is not very efficient if the task takes as long as in this last case where the turtle is moving around in circles. If you want your client to do other things while waiting for the response, you probably want to use an Action Server instead.

Using Topics

You learned how to use ROS packages to start one or several nodes. You also learned how to create your own ROS programs with Python. In this article, you will learn how to subscribe to a Topic and how to publish to a Topic.

There are many sources covering ROS Topics such as the official ROS wiki (here and here) or other websites like Robotics Back End that you can use for further understanding.

What are Topics?

As already mentioned earlier, a Topic is a way of communication between ROS nodes. This protocol created a data stream from a Publisher to a Subscriber. It is possible that several Publishers are sending data to a Topic at the same time and several Subscribers can listen to a Topic simultaneously.

Each Topic consists of a Topic name and a message type. The name is used to refer to a specific Topic while the message type defines the actual structure of the content. A fairly common Topic name is /cmd_vel which contains a Twist message. Twist messages describe the three velocity parameters for the translation and rotation of a robot. Twist belongs to a category of ROS messages called geometry_msgs. This is simply the ROS package that contains these message definitions. Twist is defined as follows:

Vector3  linear:
    float64 x
    float64 y
    float64 z
Vector3  angular:
    float64 x
    float64 y
    float64 z

Note: You can find more references to the geometry_msgs Twist messages here and here.

This means that you can access the properties of a Twist object in the following way in Python:

my_message = Twist()

my_message.linear.x = 0
my_message.linear.y = 0
my_message.linear.z = 0
my_message.angular.x = 0
my_message.angular.y = 0
my_message.angular.z = 0

First, you define the name of the variable and set it to the variable type of Twist() which is a constructor that creates a Twist object. It initializes all the values to zero.

Topics can also be less complex data types such as Int or String which then only contain a simple integer or string value. These message types belong to the ROS package called std_msgs. Another very common type is sensor_msgs for IMU data, camera data or laser scanner data.

Using Topics in Terminal

In case you only want to see the content of a topic or see what topics are available, you don’t need to write a ROS program to listen to a Topic. You can do this in the terminal as well. You can even publish some data into a Topic. This is mainly used for testing purposes and not really used for actual robot control.

Starting TurtleSim

Before you get started, open a new terminal and start a roscore with the following command:

roscore

Then, open another terminal and start the turtlesim node with the following command:

rosrun turtlesim turtlesim_node

The first thing you need to know is, how to find which Topics are already used by a robot. This is useful as you can use the Topics that are already available rather then creating a new Topic even though, it is not necessary.

Finding Information about the Topics

The following command (again in a new terminal) will show you a list of the Topics that are either being published or subscribed to by a node:

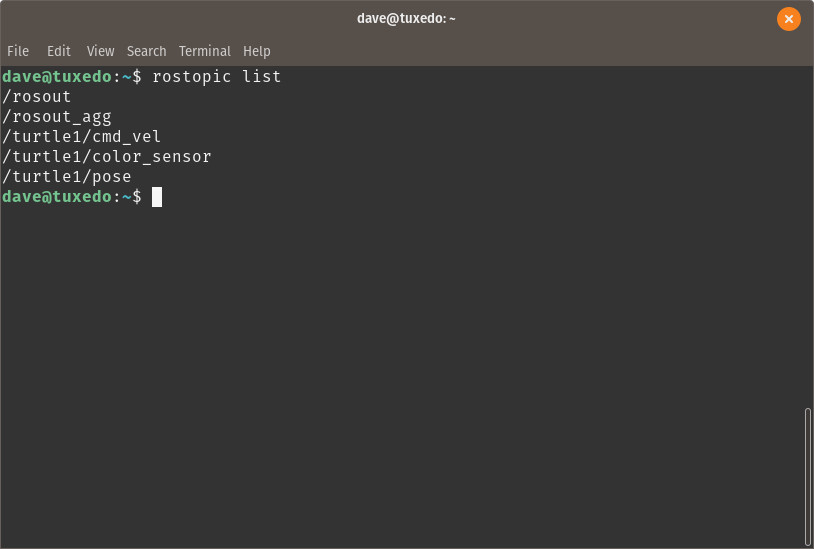
rostopic list

The output in your terminal should look like this:

Now, you know which topics are currently available. You can get more information about these Topics with the following command:

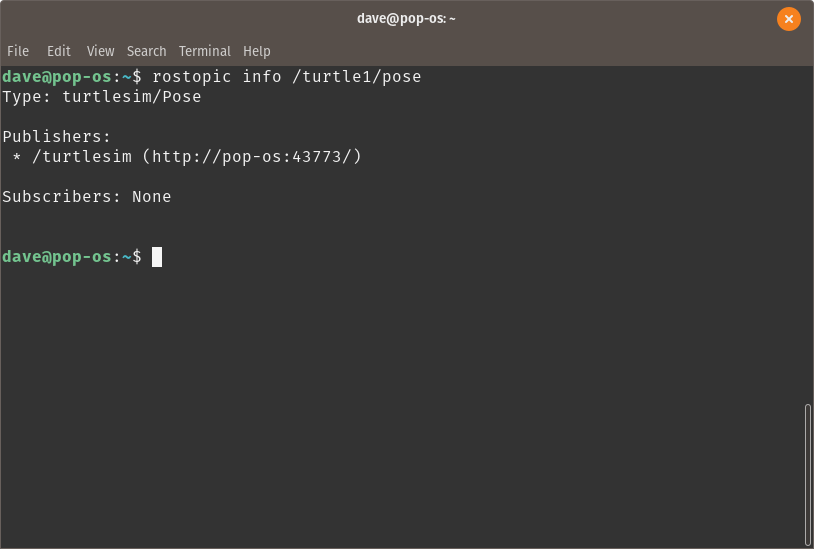
rostopic info /turtle1/pose

This command will provide the following information:

The information you get is that this topic is of type turtlesim/Pose which means it is a message type inside the package called turtlesim. The message type is Pose and it contains the following information:

float32 x
float32 y
float32 theta

float32 linear_velocity
float32 angular_velocity

The Pose messages contain information about the current position and orientation of the turtle and the linear and angular velocity. This block of information is published by the turtlesim regularly.

Subscriber

So the first thing you want to learn is how to see what is inside a Topic. Let’s take /turtle1/pose for example. You can listen to this Topic by using your terminal with the following command:

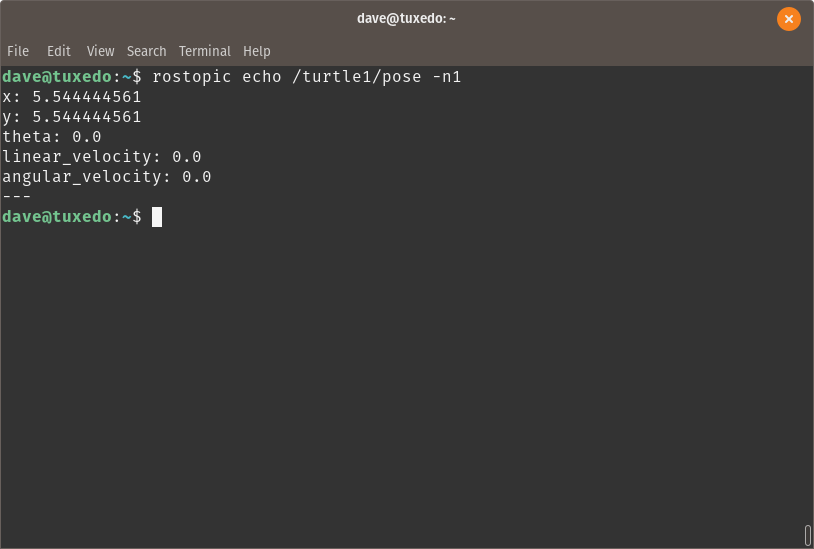
rostopic echo /turtle1/pose

Now, you will see something like the following:

You can stop the incoming messages by hitting CRTL+c on your keyboard. The Topic that you are looking at is showing you the position of the little turtle on the canvas.

Publisher

Just like you can listen to a Topic through the terminal, you can also write messages to a Topic through the terminal. Therefore, you can use the following command to write to /turtle1/cmd_vel:

rostopic pub /turtle1/cmd_vel geometry_msgs/Twist "linear:
  x: 0.0
  y: 0.0
  z: 0.0
angular:
  x: 0.0
  y: 0.0
  z: 0.5"

Instead of typing the entire command, you can simple start typing the first part of the command and then autocomplete with the TAB key:

rostopic pub /turtle1/cmd_vel [TAB][TAB]

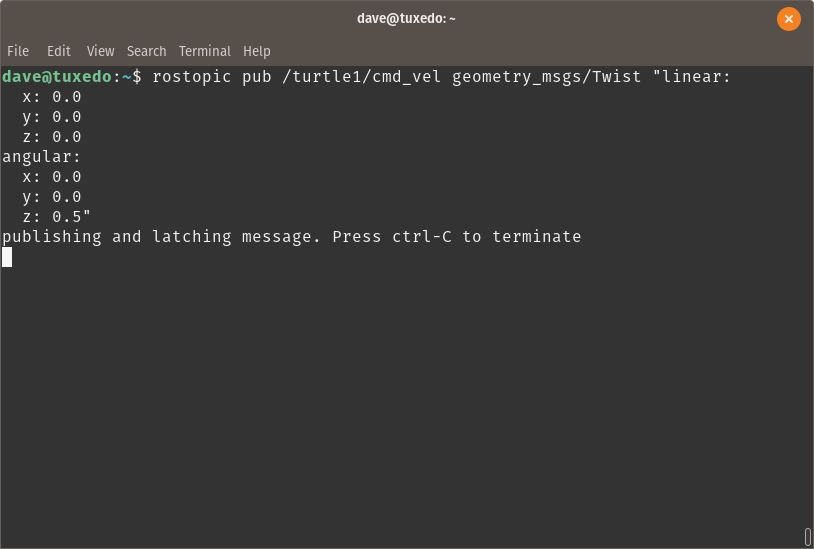
Your terminal will look like this:

And your turtle will rotate on the canvas by 0.5 radians. The terminal will only send your message once and not continuously.

Using the terminal is mainly used for quick verification or testing of a system or for a single event that doesn’t need repetition. For controlling a robot, you will probably write a program that will perform the same tasks autonomously.

Using Topics in Python

When using Python to access Topics, you can have two different kinds of programs: a Subscriber or a Publisher. In addition, you can also have a program that implements several Subscribers or several Publishers or even both.

Subscriber

When making a robotic system, you are more likely to create a ROS node that will take the role of a Subscriber. This has the advantage that you can automatically listen to a Topic and then act depending on the data your program receives.

To start, you can go to the package you already made earlier:

cd ~/catkin_ws/src/my_turtlesim/scripts

Now you can create a new file called simple_subscriber.py in which you will write the Python code to create a Subscriber node:

gedit simple_subscriber.py

Now, an empty text editor window will pop up where you can type down the following code:

#!/usr/bin/env python 

import rospy
from geometry_msgs.msg import Twist

def callback(data):
    print(data)
    print("------------------------------")

if __name__=="__main__":
    rospy.init_node("my_subscriber_node")
    my_subscriber = rospy.Subscriber("/turtle1/cmd_vel", Twist, callback)
    rospy.spin()

Save the code and then make the file executable with the following command:

chmod +x ~/catkin_ws/src/my_turtlesim/scripts/simple_subscriber.py

What this code does, is first importing the rospy library containing the necessary tools to create a ROS node and the Subscriber. Then, you also import the Twist message type that is contained in the ROS package called geometry_msgs in the subfolder msgs.

#!/usr/bin/env python 

import rospy
from geometry_msgs.msg import Twist

The next part will create a function that will be called every time a new message from the Topic is arriving. As you do not call the method by yourself, but it is triggered through the incoming message, this function is often called a callback function. Note: the word callback is not a keyword. so you can give it any name you want. A common practice is to add the word callback inside the function name.

The content of the function is simply printing the received information and then it prints a line to separate the individual messages.

def callback(data):
    print(data)
    print("------------------------------")

Finally, the main program is checking if it is the main program or if this Python script is being imported as a module by another script. Then, it initiates a ROS node. After this, the script creates a Subscriber object that listens to the topic “/turtle1/cmd_vel” which is a message of type Twist and then when receiving a message, it will call the callback function with the incoming message as an argument. Finally, the rospy.spin() function will make sure that ROS doesn’t terminate this script but keeps it active until the user manually stops the script.

if __name__=="__main__":
    rospy.init_node("my_subscriber_node")
    my_subscriber = rospy.Subscriber("/turtle1/cmd_vel", Twist, callback)
    rospy.spin()

You can start the script with the following terminal command:

rosrun my_turtlesim simple_subscriber.py

At first, you will not see anything as the node is not yet receiving any information. This is the case because there is no node publishing to the topic /turtle1/cmd_vel at this moment. You can change this by publishing a message yourself to this topic:

rostopic pub /turtle1/cmd_vel geometry_msgs/Twist "linear:
  x: 0.0
  y: 0.0
  z: 0.0
angular:
  x: 0.0
  y: 0.0
  z: 0.5"

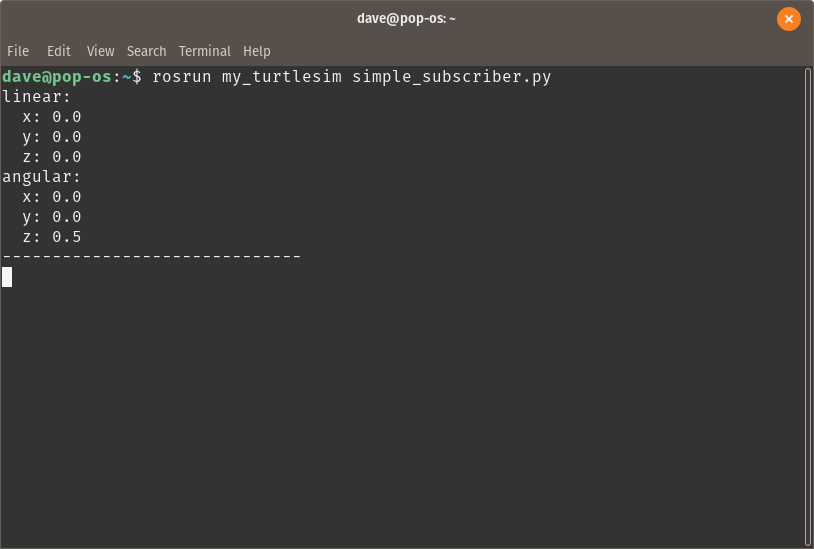
After you start publishing messages to the topic /turtle1/cmd_vel, your simple_subscriber.py will show the following:

The next step is to make a publisher node in Python that will publish Twist messages for you.

Publisher

To start, you can go to the package you already made earlier:

cd ~/catkin_ws/src/my_turtlesim/scripts

Now you can create a new file called simple_publisher.py in which you will write the Python code to create a Publisher node:

gedit simple_publisher.py

Add the following code to the file:

#!/usr/bin/env python 

import rospy
from geometry_msgs.msg import Twist

if __name__=="__main__":
    rospy.init_node("my_publisher_node")
    my_publisher = rospy.Publisher("/turtle1/cmd_vel", Twist, queue_size=10)
    rate = rospy.Rate(10)
    my_velocity = Twist()
    my_velocity.linear.x = 0.5
    my_velocity.angular.z = 0.5

    while not rospy.is_shutdown():
        my_publisher.publish(my_velocity)
        rate.sleep()


Just like the Subscriber node, you start with importing the rospy module and the Twist message as we will use this message to publish to the topic “/turtle1/cmd_vel”.

#!/usr/bin/env python 

import rospy
from geometry_msgs.msg import Twist

Inside the main program, you need to initialize a ROS node, in this case with the name “my_publisher_node”. This allows ROS to identify from which node, the topic is published.

After this, you create a publisher object with the following input parameters: topic name, message type and queue size. The topic name must have the exact same name as the topic that you want to use for communicating with other nodes. The message type indicates which variable type needs to be given to the publisher. The queue size is the length of the buffer containing the messages that still need ot be published. If the node is running too slow, the messages can pile up and the overflowing messages are ignored. With a queue size of 10, this buffer will containt up to 10 old messages until it drops newer messages. If the buffer is small, the messages are always more up-to-date while a big queue size will make sure that fewer messages are lost. Small queues are usually used for messages that require a fast reaction from other nodes while big queues are used for logging or high accuracy tasks.

if __name__=="__main__":
    rospy.init_node("my_publisher_node")
    my_publisher = rospy.Publisher("/turtle1/cmd_vel", Twist, queue_size=10)

The rate defines the frequency in Hz of the node. High frequencies result in quicker reaction times but also higher computational load and more data traffic. For many cases, a rate of 10 Hz is sufficient to keep the robot running. In a few cases, where real time behavior is wanted, 100 Hz is often used, but not much higher.

Then , with the Twist() constructor, you can create a template of your message. After initializing the message object, you can modify the variable, in this case my_velocity, to meet your wanted behavior. The code below will introduce a linear velocity in x direction which is the front of the robot and an angular velocity around the z axis which is pointing upwards.

    rate = rospy.Rate(10)
    my_velocity = Twist()
    my_velocity.linear.x = 0.5
    my_velocity.angular.z = 0.5

Finally, you need a loop that will keep your ROS program running until you stop it. Otherwise, the robot would only make a small step forwards and then stop. With this loop, it will keep driving forward and turn so that it will create little circles.

The condition “rospy.is_shutdown” will be false until you press CTRL+c on your keyboard to stop the program. Until then, this while loop will keep running. Inside the loop, the my_velocity message is sent to the topic /turtle1/cmd_vel. In this scenario, the message will not be updated. In a real robot, you would also read sensor data inside this loop and change the behavior of the robot with conditional statements.

The rate.sleep() function will make sure that the loop will not go to the next iteration until a certain time has passed. This time is defined by the frequency that you specified earlier. This is necessary in each Publisher as it would otherwise run through the loop as fast as it could and overflow the topic with data. If you would use a simple function to wait for 100 ms, the speed of your loop could change depending on how log the CPU needs to process the algorithms inside the loop. As this would be unreliable and inconsistent, the sleep function is the go-to method. If the algorithm inside the loop take longer, the loop will not wait at all, and when the algorithm takes less time, it will wait until the timer to maintain the specified frequency has been reached.

    while not rospy.is_shutdown():
        my_publisher.publish(my_velocity)
        rate.sleep()

You can start your publisher node with the following command:

rosrun my_turtlesim simple_publisher.py

You will notice that the terminal does not show anything, but the turtle will start to move in a circle.

You can also verify the published messages with the following command:

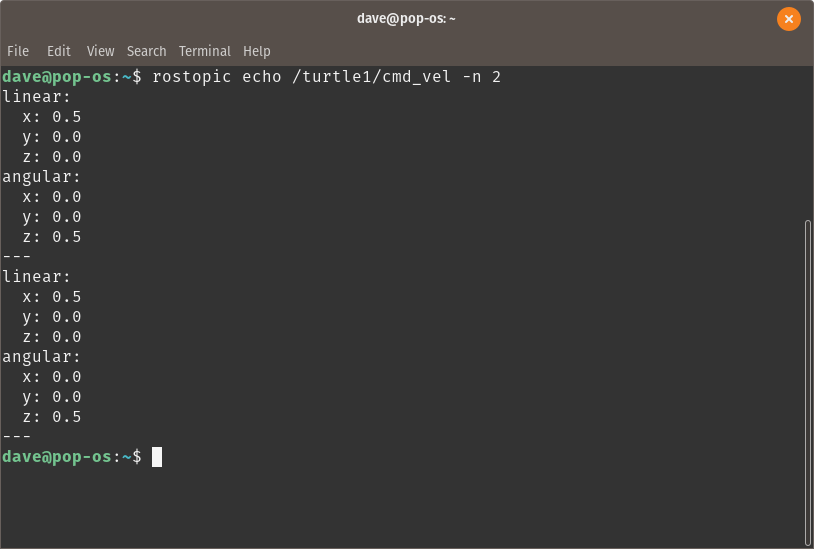
rostopic echo /turtle1/cmd_vel -n 2

This command will show you the messages send to the topic /turtle1/cmd_vel, which are the Twist messages that your simple_publisher.py program is publishing. The command above will show the following:

Note that the echo command usually keeps printing the new messages but with the parameter -n 2 it only prints two messages.

That’s it. Now you are able to write nodes that can subscribe or publish to topics. In some cases, you need to combine both in a single program. For now, you can continue with Services and how to set up a Service Server and how to create a Service Client.

Creating ROS Packages

After you learned how to use a ROS package, you will learn how to create your own ROS package.

Create a Package

Creating a package is done by using the catkin environment as each ROS package is following the catkin format. First, you need to go to your catkin workspace which is called catkin_ws. Open a terminal and type:

cd ~/catkin_ws

Next, you need to enter the src directory which stores the source code of your own packages:

cd src

You can create a new ROS package with the following command:

catkin_create_pkg <package_name> <dependencie_1> <dependencie_2> <dependencie_3> <...>

Here, the <package_name> is the name of your package. Note that you can not simply change that name after you created it as you will need to modify the CMakeLists.txt file and the package.xml file. The <depenencies> are entries in the CMakeLists.txt and package.xml files that allow ROS to include some libraries that you can use. For Python programs, you need to add the dependency rospy and for C++ programs, you need to add roscpp. If you use libraries for navigation, sensor data collection or something else, you can also add these dependencies here.

For you package, you will simply add the rospy dependency and you can call the package my_turtlesim.

catkin_create_pkg my_turtlesim rospy

It is a convention to name packages with lower case names combined with an underscore. This notation is also called snake case.

Now, a new directory has been created containing a CMakeLists.txt file and the package.xml file and a folder called src. This folder is meant to contain the C++ source code. This is why many people and tutorials make a new directory for Python scripts called scripts. Therefore, type the following in your terminal:

cd ~/catkin_ws/src/my_turtlesim/
mkdir scripts

If you also have a robot model, configuration files or documentation to your package, you can create more folders and store the files in the correct folder.

Create a ROS Python Program

Now, you can create your first ROS program with Python. Enter the scripts directory with your terminal:

cd scripts

You need to create a new file with the file extension .py in order to have a Python file. You can create a new file and open it with your terminal with the following command:

gedit my_first_program.py

You will see that a new window will open on your screen with an empty text file. This is where you will write your first ROS program in Python.

Write the following code in your file and save the file:

#!/usr/bin/env python

import rospy

if __name__ == "__main__":
    rospy.init_node("my_first_node")
    rospy.loginfo("Hello World!")

Note: in order to use the ROS tools inside a Python script, you need to import rospy. Also, as every ROS program is running as a node, you need to declare a name for your node with the rospy.init_node(“my_first_node”) function. Each ROS node needs to have a name as otherwise the roscore doesn’t know which node is executing code. This means, one of the first things you want to do in your programs is to declare the name of the node.

Before you can run your program, you need to make the Python file executable, this means to give this file permissions from your system to be executed as a program. Usually, files only have the permission to be read as a file or to be modified. This is also known as read-write permission. To add the permission to execute the file, make sure you are in the scripts directory and type the following command in your terminal and press ENTER:

chmod +x my_first_program.py

Making Python files executable is required for each Python file you create but you only need to do this process once for each Python file. You can run your Python program with the following command:

rosrun my_turtlesim my_first_program.py

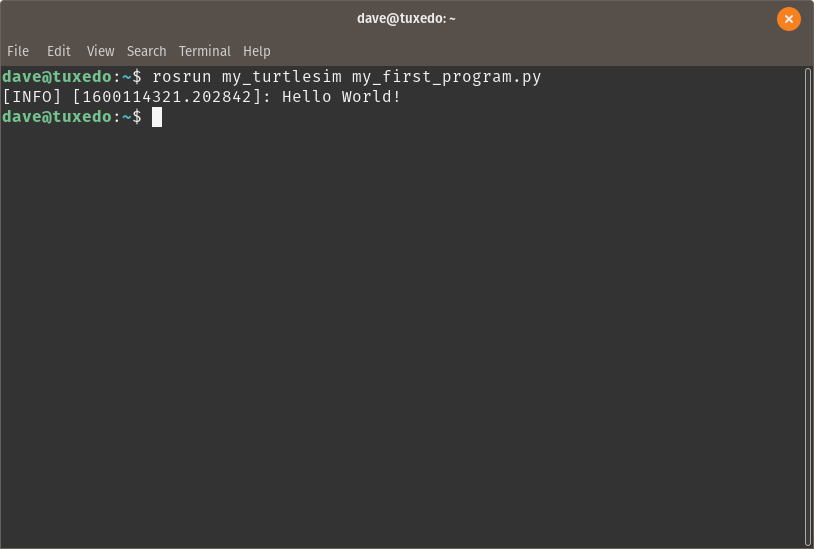
The terminal in which you started the Python program should output some text as you can see below:

Tip: you don’t need to type the entire command by yourself. If you start typing a word, you can double tap the TAB key on your keyboard to auto-complete the commands in your terminal.

Note: if your computer doesn’t show your ROS package, first make sure you actually have spelled the names correctly and that the package actually exists. Also, if the package is new, ROS might not know about it yet. Therefore, type the following to list all the packages on your system, after that, ROS should be able to auto-complete the name of your package as well:

rospack list

The above command will list all the installed ROS packages on your computer. As ROS is going through the entire system, it will probably find your package and add it to its known packages.

Create a launch file

You have already seen how to start a ROS program by using the rosrun command. The rosrun command allows you to start one single program at a time. In most cases, one single program will not be enough to get your robot up and running. In these cases, a launch file will make your life easier.

First, create a directory called launch to organize your package. Therefore, you must be inside your my_turtlesim folder.

cd ~/catkin_ws/src/my_turtlesim/
mkdir launch

Even though, there is no requirement to call this directory launch, it is a widely used convention. The best idea is, to stick to these conventions as they make life easier for you and your team.

Now, enter the new directory to create a new file. You can do this with your file browser or with the terminal:

cd launch

You can create a new file and open it with your terminal with the following command:

gedit turtlesim.launch

Now, a new window should open up. It shows an empty text file. The launch extension is actually a XML file type that is used to create and structure a launch file for ROS.

Type the following code into the launch file and save the file:

<?xml version="1.0" encoding="UTF-8"?>

<launch>

    <node
        name="my_node"
        pkg="my_turtlesim"
        type="my_first_program"
        output="screen"/>

</launch>

Note: unlike Python programs, you do not need to make the launch file executable.

You can simply start it with the following command in a new terminal:

roslaunch my_turtlesim turtlesim.launch

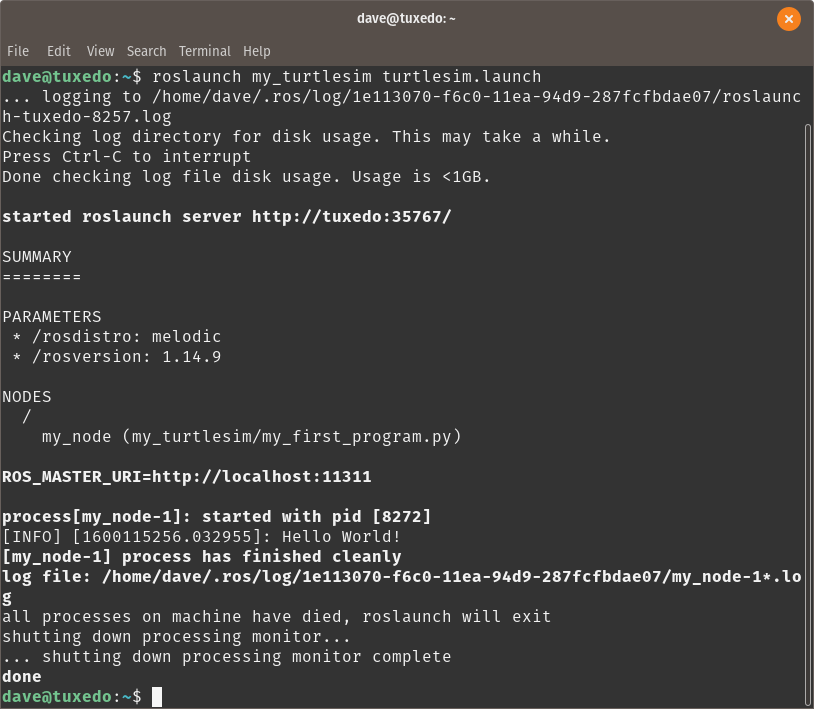
The above command will give you the following result:

You can see that the roslaunch method of starting a program outputs much more in the terminal. This is because there is much more going on. At first, ROS will check if there is already a roscore running and if not, it will start the roscore. Next, it will start the programs that are listed in the launch file.

As you added the line output=”screen” to the launch file, it will print the output on the terminal, otherwise it would not show anything from the started programs.

You can now change the content of the launch file into the following code:

<?xml version="1.0" encoding="UTF-8"?>

<launch>

    <node
        name="turtlesim_node"
        pkg="turtlesim"
        type="turtlesim_node"
        output="screen"/>

    <node
        name="draw_square"
        pkg="turtlesim"
        type="draw_square"
        output="screen"/>

</launch>

Save the file and launch it again with:

roslaunch my_turtlesim turtlesim.launch

You should now see that the turtlesim window is opening and the turtle is immediately starting to move in a square pattern. The launch file has now started two ROS programs at the same time. This makes many things much easier. On top of that, you do not need to first start the roscore as the launch file is already starting it for you.

Explanation of the Launch File

The launch file is written in XML syntax. This means you have tags that are indicating the type of content. The following tag tells your computer what type of file the launch file actually is:

<?xml version="1.0" encoding="UTF-8"?>

The content of your launch file will then be written inside the launch tags:

<launch>

</launch>

Lastly, the node tags describe what ROS program you want to run. This is indicated with the following lines:

    <node
        name="turtlesim_node"
        pkg="turtlesim"
        type="turtlesim_node"
        output="screen"/>

Here, the syntax is as follows:

    <node
        name="<name_of_the_node>"
        pkg="<name_of_the_package>"
        type="name_of_the_program_file"
        output="screen"/>

In this context, the <name_of_the_node> refers to the name you used inside the rospy.init_node() statement. As you do not know the exact name of the turtlesim_node source file, you can just assume it has the same name as the program name. The <name_of_the_package> is the name of the ROS package that contains the wanted ROS program. The <name_of_the_program_file> is the name of the Python file with the .py extension or the name of the compiled C++ program which doesn’t have any extension in Linux.

The output=”screen” will make sure that all text will still be shown on the terminal. On a robot, you do not need this but for running programs on your computer with a screen, this is helpful to see what is happening. In case you create a launch file and you don’t see output in your terminal, check if this is missing.

With this, you have learned how to run and how to create ROS packages. Next, you will learn how to subscribe and publish to Topics.

Using ROS Packages

The following article will explain what a ROS package is and how you can use them to run programs in ROS, the Robot Operating System.

What are ROS Packages?

As mentioned earlier, every program in ROS is delivered as a package. A package can contain various types of files where the most important files are the CMakeLists.txt file and the package.xml file. These two files are automatically generated when you create a package. These files contain information about the package so it can be build, which means the source code can be compiled so that you can run the programs. This means, that packages usually also contain the source code of the programs you want to run.

Now that you have an idea what a package is, you can see how you can run them.

Running a ROS package

Before running a ROS program, you need to do a couple of extra steps in advance. These steps are to build the catkin workspace, start the roscore and then starting the actual program.

The catkin workspace

A catkin workspace is a directory on your computer that follows some specific guidelines. These make it easier for the software using the directory and its files to find what it needs, in this case, the source code of your software.

To build your catkin workspace which you have created during the installation of ROS, you type the following two commands, assuming you called your catkin workspace also catkin_ws:

cd ~/catkin_ws
catkin_make

After catkin has finished, you can now start a roscore and then run the software.

Starting ROS

Before you can run any ROS program, you need to start a roscore. This can be done by opening a terminal and typing the following text and then hitting ENTER on the keyboard:

roscore

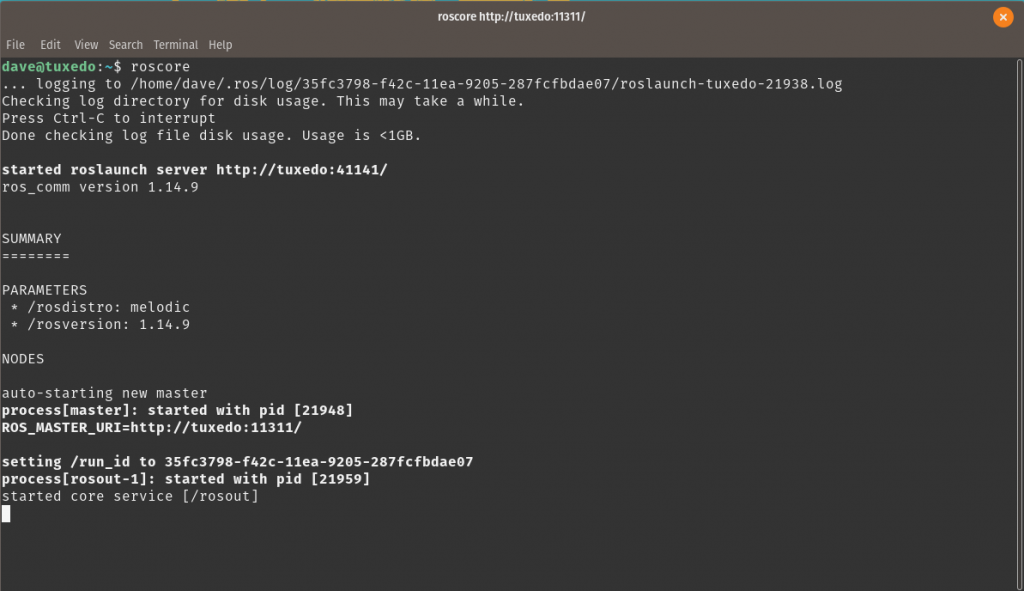
Starting the roscore in the terminal should output something similar to the following image:

Now, the roscore should be running and the computer is ready to run ROS programs. Note: only one single roscore can run in the same robotic system at the same time, so you only need to do this step once.

If the roscore dies, you need to restart it. You can also stop the roscore by pressing CTRL+c on your keyboard.

Running a ROS program

Now, it is time to start a real ROS program. Therefore, you need to open a new terminal and then you can run a program with the following syntax:

rosrun <ros_package> <ros_program>

Of course, the <ros_package> and the <ros_program> are placeholders and need to be replaced by an actual package and program name. For example, you can run the turtlesim program which is an animated 2D turtle that can be controlled with ROS commands just like a real robot.

rosrun turtlesim turtlesim_node

Now, a little window should open on your screen and you should see a little turtle in the middle of a colored canvas.

Next, you can interact with the turtle by starting another node by opening a new terminal and typing:

rosrun turtlesim draw_square

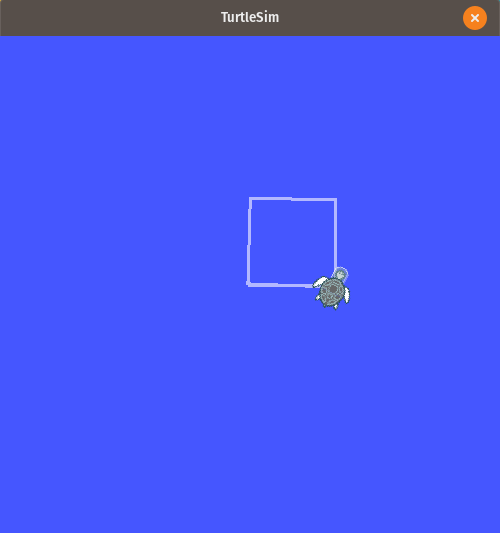
The turtle will start moving in a square shape and it will draw a line on the canvas where it is moving:

At this point, you have two ROS programs running that interact with each other. As mentioned earlier, each ROS program is running as a node. These nodes can be visualized with a program called RQT. You will learn more about this software later, but here is the graph that this software will generate for your current setup:

You have two nodes running and they communicate by using Topics. In the next article, you will learn how to create your own package and how you can simplify the process of starting multiple ROS programs at the same time.

Overview of ROS

After you installed ROS, you will learn how to actually use ROS. Therefore, you will get an overview of what ROS does for you and how it works.

The Robot Operating System (ROS) is a meta-operating system that is installed on top of your actual operating system. In this case, you installed Ubuntu as your operating system.

To simplify things, you can see ROS as a tool-box including libraries and programs to develop and run robots. Some of the libraries are the OpenCV library for computer vision tasks and the tf library for frame transformations. Some of the tools that are included are Gazebo for robot simulations and RVIZ for visualization of your robot. In addition to that, there are software packages that have been created for specific tasks such as robot navigation or motion planning which you can simply install as they are openly available. For more information about ROS, you can have a look at the ROS Wiki.

ROS is released in different versions that go along with the current Ubuntu versions. The version discussed on this website is ROS Melodic which has been released for Ubuntu 18.04.

ROS Structure

Programs within ROS are not simply started like other programs. Each ROS program is called a ROS node. Each node is usually built for one specific task such as navigation, reading sensor data or managing data and tasks. The nodes can communicate with each other to provide data to another node. The nodes can run with different frequency rates and they can even be executed asynchronously, which means one node can wait for the output of another node depending on the application. Having several nodes has the advantage that a failure that may crash a single node will not affect other nodes.

As an example, imagine the robotic arm will have an error and causes its node to crash, the navigation and the vision nodes will still be running. Furthermore, ROS can then restart the single node that crashed and send a warning to an operator and write the crash into a log file.

The implementation of having nodes run in parallel is also a very easy way to implement multi-threading which means the processor can run many tasks at the same time instead of one task after another.

Communication between Nodes

When several nodes want to exchange data, they need to communicate with each other. ROS has three main methods of implementing communication between nodes: Topics, Services and Actions.

Topics

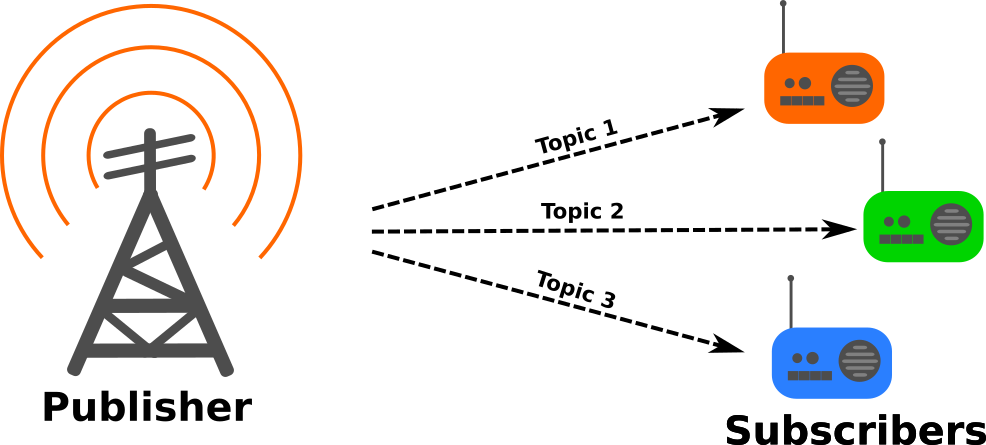
Topics are the most important type of communication in a ROS system. They provide a constant flow of data from one node to another. This can be compared with broadcast radio where there is a constant signal with audio information. The radio doesn’t wait for the radio station to send a signal and the station doesn’t care how many radios are listening.

In ROS, such a broadcaster is called a Publisher node which is publishing to a Topic. A node that is listening to that Topic is called a Subscriber which subscribes to this Topic. The Topic is the actual data stream containing a specific type of information such as camera data or movement data.

In other words, Topics send data from a Publisher to a Subscriber in form of a data stream. This is important for applications that require constant data input. These data streams create a lot of data traffic within the ROS network which needs to be kept in mind when creating another Topic.

The most prominent Topic used in a robot is the /cmd_vel Topic that contains the velocity commands for the robot. These commands tell the robot where to go and at what speed.

For more information about Topics, you can have a look at the ROS wiki page.

Services

Services are less frequent than Topics but they can be very handy to reduce the overall data flow. Services do not provide a data stream, but instead, they work with asynchronous data requests similar to a web server hosting a website. When a person is calling a website, the computer sends a request to the server for receiving the web site content. After the web server has executed its task, it will send the requested data to the user and the communication is finished.

A Service is also implemented by setting up a Service Server which will wait for a call while the Service Client will call this Server. The Server will then perform its task once and send a signal back to the Client to tell if it finished successfully or failed. That’s it, there is no more communication between both sites. Also, the Client will wait for the response from the Server and will only resume its task when it received a response.

An example of when to use a Service would be a drone that is taking of, or even landing. When taking off, the drone simply needs a single signal to start the takeoff process and it doesn’t require constant input from the controller. When the drone is up in the air, it will send a quick response to the controller to say that it has succeeded.

For more information about Services, you can have a look at the ROS wiki page.

Actions

Actions can be seen as a middle ground between a Topic and a Service. Just like a Service, there is an Action Server and a Client. Now the difference to a normal Service is that a Service Client is waiting for a response from the Server while an Action Client will continue with another task. On the Action Server, the task will be executed and the Action Server will send regular updates to the Client. These updates are less frequent than a Topic but they occur at a user-determined frequency.

In other words, with Actions, the Client doesn’t need to wait, but similar to a Service it will get a response when the Server has finished its task.

A good example of using an Action would be the action of a mechanical gripper. While it is closing, it will provide you with information on whether it is closed or not. Also, Actions are ideal for tasks that do not need a constant data stream but yet take more time which makes it impossible to simply wait for the result. If your robot shall drive and perform another task, you cannot allow the robot to wait for the feedback of a Service, therefore, an action would be ideal in this case as the robot is still capable of observing its environment while waiting for the result of the Action.

For more information about Actions, you can have a look at the ROS wiki page.

Combination of Topics, Services and Actions

Usually, you take the tools that are best suited for the job. In the case of ROS, you have to choose whether to use a Topic, a Service or an Action. In a complex system, there are usually many different ways of communication used at the same time.

For example, then you want to control an autonomous drone, you will simply use a Service for a takeoff command while you will have a Topic that gives you information on the position and height of the drone. Once you worked with some ROS packages, you will get a feeling of when to use which type of communication.

Software Management

The entire ROS system is managed by something called the roscore which observes all the active nodes and manage all the communication done through Topics, Services and Actions. The roscore is what creates the magic behind ROS as it manages all the tasks in the background.

The roscore is watching each node and its state. If a node crashed, it will keep track of this and depending on the configuration, it will run that node again to make sure the underlying task will be executed. As the roscore is the root of all the ROS behaviour, this node needs to be the first node to be running.

Besides from watching the nodes, the roscore also manages the data traffic by looking which Topics, Services and Actions are currently available, which of these are currently called and which node is calling which message type at what time.

Programs in ROS

ROS officially supports two different programming languages: C++ and Python. C++ is more resource-efficient and the code runs faster as it is a rather low-level programming language and because it is compiled (this means, the source code is converted into machine code) before the execution. Python on the other hand is slower as it is a scripting language but this makes it faster to test the code as no compilation is necessary. If you want to learn more about how to program with Python, have a look at this programming guide!

Next to C++ and Python, many more programming languages are not officially supported by ROS, but there are libraries to bring the ROS functionality to the corresponding language such as Go or Rust.

Packages in ROS

ROS is built to be modular. This means that the software is split into several packages that can interact with each other. usually, there are packages for navigation, sensing the environment, mapping the environment, computer vision and general control of the robot. Having several packages makes it easy to share the functionality of one package across several different robots. At the same time, when you create a new package, you only need to program the parts that are not already implemented in another package. To increase reusability, it is important to keep your code robot-agnostic which means the code should work for all situations and not only for this very specific robot. If the package works despite it doesn’t know which robot it is running on, it is more modular and can be shared with colleagues across the world or simply within the robotics group that you are working with.